Description
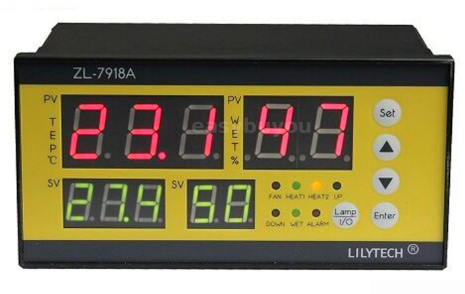
ZL-7918A is an intelligent temperature and humidity controller, which is safe, stable and easy to operate. It is suitable for the control of incubators, climate chambers, warehouses, etc.
It can be applied to temperature and humidity control of poultry egg incubators, mushroom cultivation, artificial climate chambers, warehouses and other occasions.
Main functions: lighting control, auxiliary heating, temperature control, humidity control, egg turning control, timing ventilation control, alarm control, temperature and humidity calibration, hatching days display.
Features
- High accuracy.
- Digital display.
- Easy to store.
- Improving work efficiency.
- It is an indispensable controller for home and industrial use.
Specifications
- Material: ABS
- Color: black
- Power supply: AC 100~240V 50/60Hz
- One temperature sensor (L=2.0 meter), one humidity sensor (L=2.0 meter)
- Setting range: humidity 10~80% RH, temperature 1~65℃
- Display range: humidity 0~99% RH, temperature -9.9~99℃
- Measuring accuracy: humidity ±3%@25℃, temperature ±1%@25℃
- Output control: 7 outputs (main-heater, aux-heater, fan, egg left-turning, egg right-turning, humidity, illumination)
- Output load: heaters ≤ 1500W. Illumination ≤ 100W. Humidity, fan and egg turnings ≤ 1A/250V AC
- Hatching day record: the maximum record is 99 days
- Egg-turning control: Period: 1~999 minutes. Turning time: 0~999 seconds. Turning times: 0~999 times
- Ventilation control: Period: 1~999 minutes. Ventilating time: 0~999 seconds
- Illumination control: Period: 1~999 minutes. Illuminating time: 0~999 seconds
- Operation environment: -10~45℃, <90%RH without dew
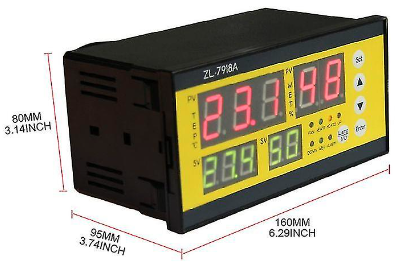
- Item size: 160 * 95 * 80mm / 6.3 * 3.7 * 3.1in
- Installation drilling size: 151.5 * 76.5mm / 6.0 * 3.0in
- Package size: 170 * 140 * 100mm / 6.7 * 5.5 * 3.9in
- Package weight: 700g / 1.5lb
Getting started with the ZL-7918A Controller
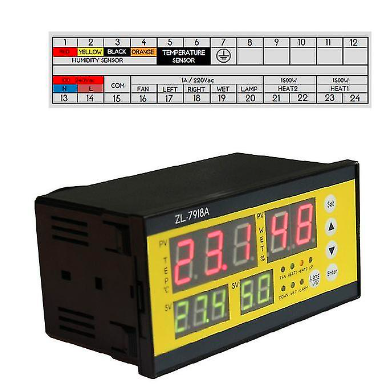
Now below are schematics showing the right way in which the controller should be connected
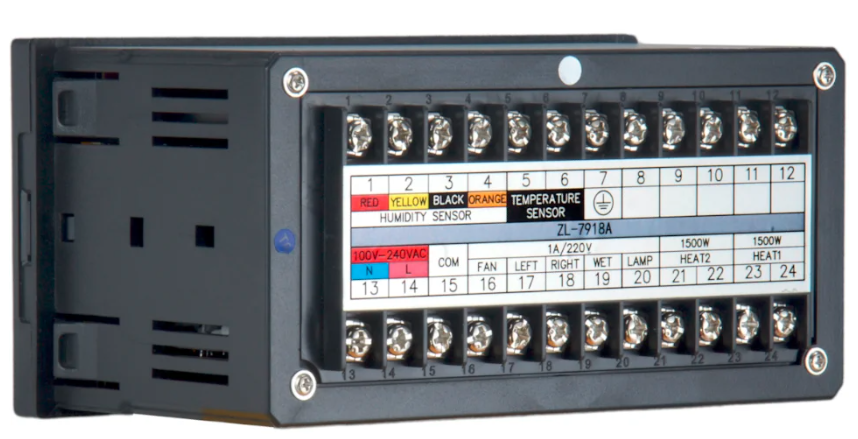
The back of the ZL-7918A
The figure below shows how all supported equipments and its sensors should correctly be connected to the ports of the controller.
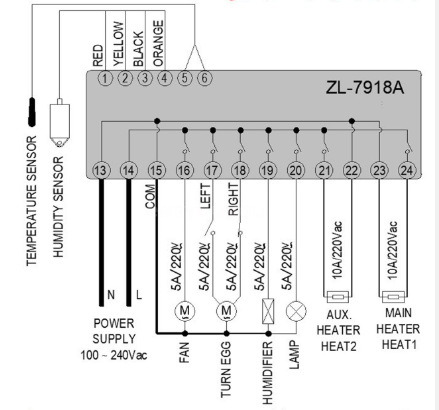
Now all the above, if followed well, that’s all for the controller connections and it serves its purpose effectively.
Follow this link for further research

