Description
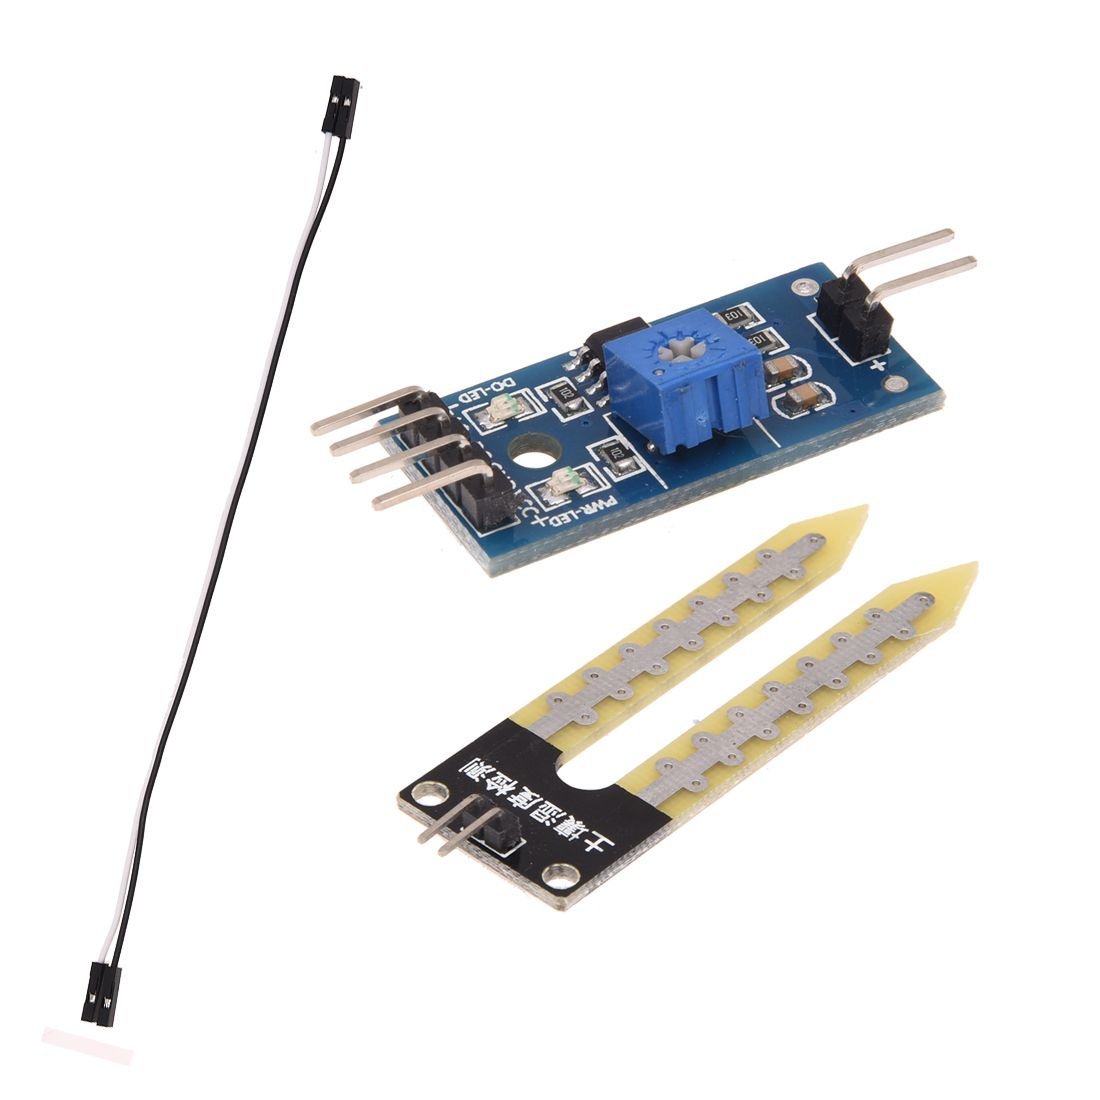
Interface (4-wire):
VCC: 3.3V-5V
GND: GND
DO: digital output interface (0 and 1)
AO: analog output interface
Instructions for Use:
- Soil moisture module is most sensitive to the ambient humidity is generally used to detect the moisture content of the soil.
- The digital output D0 can be connected directly with the microntroller.
Getting started Soil Moisture Sensor
In this tutorial we will use one soil hygrometer module to measure soil moisture of a pot.
The module can give us a digital signal when the soil need watering and this output can be adjusted by the potentiometer. Or it can give us an analog signal of current soil moisture!
In this tutorial we will use the analog signal output of this module and we will change it in percentage value. Finally we will print in serial monitor the current percentage value of soil moisture.
So, let’s get started!
Step1: Hardware required
For this tutorial you will need:
- Arduino uno
- Breadboard
- Soil hygrometer/moisture module
- jumper wire
- And some soil for testing
Step2: Connecting the hardware
The Circuit
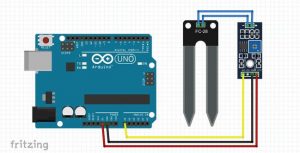
The connections are pretty easy, see the above image with the breadboard circuit schematic.
Step3: Making the code and Upload it!
//Constants
const int hygrometer = A0; //Hygrometer sensor analog pin output at pin A0 of Arduino
int value;

void setup(){

Serial.begin(9600);
}

void loop(){
// When the plant is watered well the sensor will read a value 380~400, I will keep the 400
// value but if you want you can change it below.

value = analogRead(hygrometer); //Read analog value
value = constrain(value,400,1023); //Keep the ranges!
value = map(value,400,1023,100,0); //Map value : 400 will be 100 and 1023 will be 0
Serial.print("Soil humidity: ");
Serial.print(value);
Serial.println("%");
delay(2000); //Read every 2 sec.
}
Then Upload

