Description
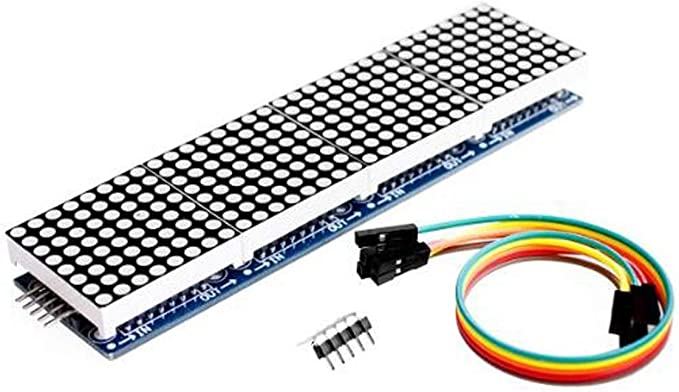
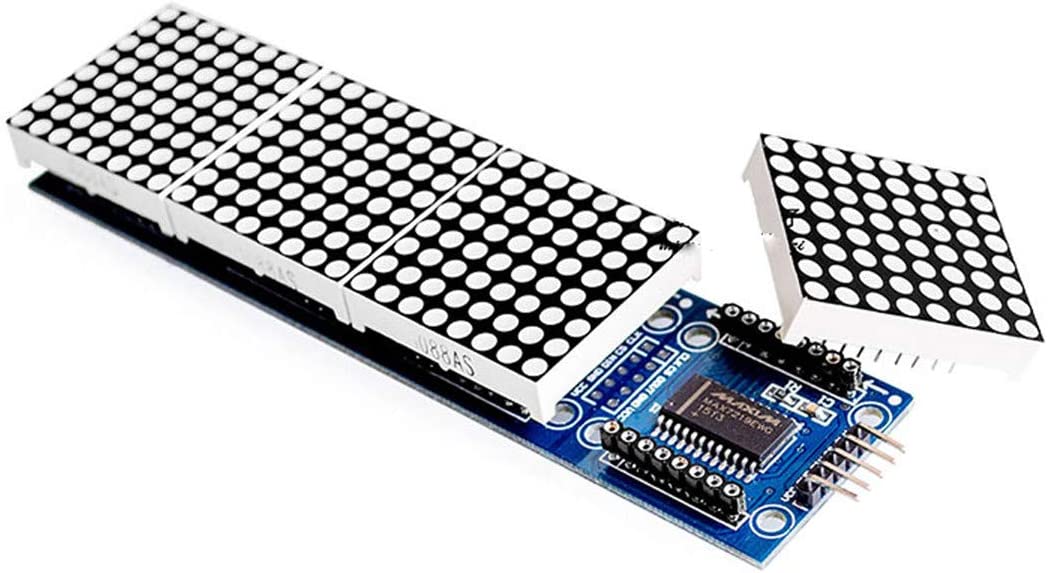
This 8×32 LED Matrix Display is a cluster of 4 single modules, internally connected. These modules can also be separated, because every module carries the same Maxim MAX7219 chip, and comes with the same power and data connection. It includes an on-chip B-type BCD encoder, multi-channel scan loop, segment word driver, and an 8×8 static RAM to store each data. Only one external register is used to set the segment current of each LED. A convenient four-wire serial interface can be connected to all common microprocessors. Each data can be addressed without any need to overwrite all displays when updating. The MAX7219 also allows the user to choose whether to encode or not encode each data. The entire device includes a 150μA low-power shutdown mode, analog and digital brightness control, a scan limit register that allows the user to display 1-8 bits of data, and a detection mode that allows all LEDs to illuminate.
Module parameters:
- A single module can drive an 8×8 common cathode matrix
- Module working voltage: 5V
- With 16 fixing screw holes, aperture 3mm
- Module with input and output interface, support multiple module cascade
- Color: red
Wiring instructions:
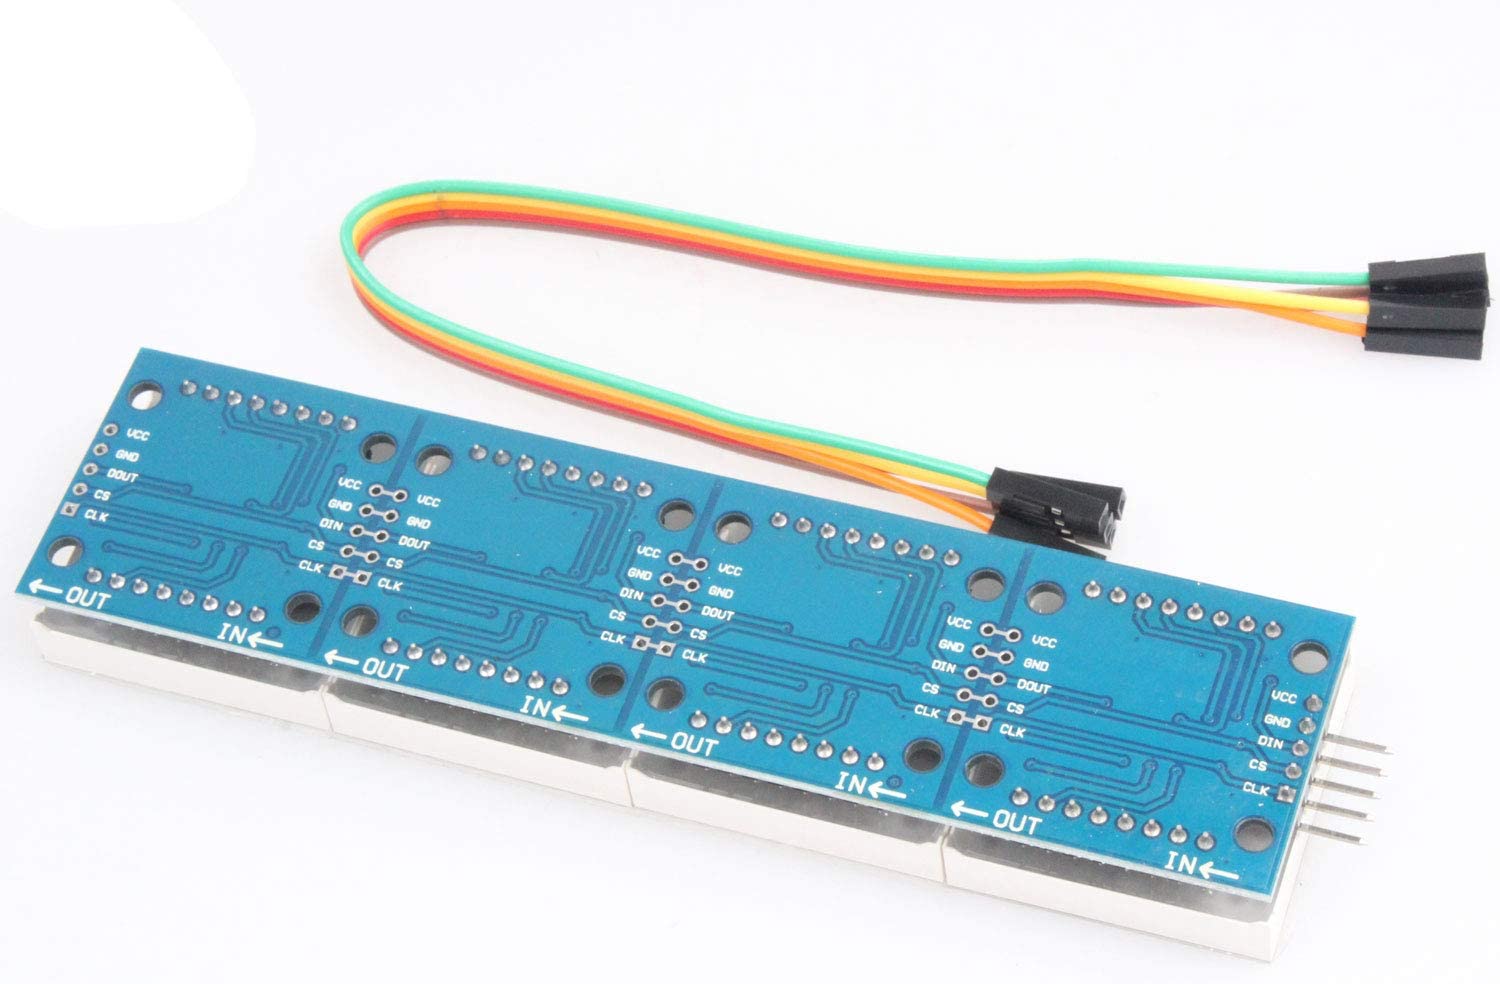
- The left side of the module is the input port, and the right side is the output port.
- When controlling a single module, you only need to connect the input port to the CPU.
- When multiple modules are cascaded, the input of the first module is connected to the CPU, the output is connected to the input of the second module, the output of the second module is connected to the input of the third module, and so on.
VCC → 5V
GND → GND
DIN → P2.2
CS → P2.1
CLK → P2.0
Interfacing 8×32 MAX7219 Dot Matrix LED Display with Arduino
Now let us see how we can interface 8×32 MAX7219 Dot Matrix LED Display with Arduino Board to display some texts and numbers.
This display draws a lot of current, therefore we need to run the module from the external power supply instead of the 5V supply from the Arduino board. You need to use an external power adapter of 5V, 3A rating connected to the 5V & GND Pin of the Arduino Board.
As the MAX7219 module requires a lot of data transfer, it needs to get connected to the hardware SPI pins on a microcontroller. For Arduino boards such as the UNO/Nano those pins are digital 13 (SCK), 12 (MISO), 11 (MOSI), and 10 (SS).
Connect the CLK, CS, DIN Pin of 8×32 LED Dot Matrix Display to Arduino digital pin 13, 10, 11.
In this guide we are using FC-16 MAX7219 Module. If you want to daisy-chain multiple displays to create a larger display, connect the DOUT of the first display to the DIN of the next display. VCC, GND, CLK, and CS will all be shared between displays.
Library Installation
Controlling the MAX7219 module is a complex task and requires a lot of lines of code. Fortunately, the MD_Parola library is available to remove those complexities so that we can issue simple commands to control the display.
To install the library navigate to Sketch > Include Library > Manage Libraries. From the Search, options look for ‘max72xx’ and click on install.
This MD_MAX72XX library is a hardware-specific library that handles lower-level functions. It needs to be paired with MD_Parola Library to create many different text animations like scrolling and sprite text effects. Install this library as well.
Source Code/Program for Text/Number Printing
Copy the following code and paste it on your Arduino IDE.
|
1
2
|
#define HARDWARE_TYPE MD_MAX72XX::FC16_HW
//#define HARDWARE_TYPE MD_MAX72XX::GENERIC_HW
|
From these lines, select the hardware type. In our case the hardware type is FC16_HW.
|
1
|
myDisplay.displayScroll(“How To Electronics”, PA_CENTER, PA_SCROLL_LEFT, 200);
|
In these lines type any text and numbers you want to display on the LED Display.
Now you can upload the code to the Arduino Board.
|
1
2
3
4
5
6
7
8
9
10
11
12
13
14
15
16
17
18
19
20
21
22
23
24
25
|
#include <MD_Parola.h>
#include <MD_MAX72xx.h>
#include <SPI.h>
#define HARDWARE_TYPE MD_MAX72XX::FC16_HW
//#define HARDWARE_TYPE MD_MAX72XX::GENERIC_HW
#define MAX_DEVICES 4
#define CS_PIN 10
MD_Parola myDisplay = MD_Parola(HARDWARE_TYPE, CS_PIN, MAX_DEVICES);
void setup() {
myDisplay.begin();
myDisplay.setIntensity(4);
myDisplay.displayClear();
myDisplay.displayScroll(“How To Electronics”, PA_CENTER, PA_SCROLL_LEFT, 200);
}
void loop() {
if (myDisplay.displayAnimate()) {
myDisplay.displayReset();
}
}
|
Output Test
I want to display the scrolling text “How To Electronics”. The text will scroll like this.
Package includes:
1×MAX7219 Dot Matrix Module 5V 8*32 LED Display, 4-in-1 Display
1×20cm 5P DuPont line



Reviews
There are no reviews yet.