Description
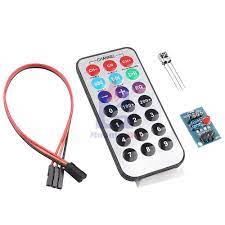
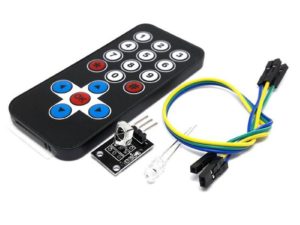
This is HX1838 VS1838 NEC Infrared Remote control Sensor Module For Arduino. The sensor uses HX1838, with high sensitivity and Operating voltage 5V. Output form Digital output. VCC: 3.3V-5V external voltage (can be directly connected to the 5v microcontroller and 3.3v microcontroller).
Kit theory test distance of about 5-8 meters, but the practical application depends on the ambient factors you use, as well as the middle barrier (such as diaphragm, glass, obstructions or other material blocking),
Features
Double sided soldering PCB design with reserve I/O port.
HX1838 sensor inside.
Digital output.
Specification
Module Port:
VCC: Connect 3.3-5V power supply. (directly connects to 5V/3.3V SCM)
GND: to ground cord
IN: to SCM I/O port
Work Frequency: 38KHz
Work Range: 5-8m
Getting started with the HX1838 Infrared Remote Control Module For Arduino
It is really easy to control an Arduino using an infrared remote
Hardware required
- Arduino Uno
- Jumper wires
- HX1838 Infrared Remote Control Module
Connecting the Hardware
You will need one Arduino for this. I used a UNO, but just about any Arduino should work. First wire up the infrared receiver that came with your kit. There are 3 wires, PWR, GND, and SIG, I used port 11 for SIG.

Setting up the library
In order to reverse engineer the remote and obtain the codes for each button we are going to need to download and install the following library click here.
Upload the sample sketch
Paste the following code into the new sketch. Then upload it .
/*
Codes modified by Faranux.com
* Lets get started:

The IR sensor's pins are attached to Arduino as so:
Pin 1 to Vout (pin 11 on Arduino)
Pin 2 to GND
Pin 3 to Vcc (+5v from Arduino)

*/

/*******************CODE BEGINS HERE********************/

#include <IRremote.h>
int IRpin = 11;
IRrecv irrecv(IRpin);
decode_results results;

void setup()
{
Serial.begin(9600);
irrecv.enableIRIn(); // Start the receiver
}

void loop()
{
if (irrecv.decode(&results))
{
Serial.println(results.value, HEX); // Print the Serial 'results.value'
irrecv.resume(); // Receive the next value
}
}
Open the Serial Monitor
Connect the Arduino to your computer using the usb port, then upload the sketch. Open up the Serial Monitor, get the remote and press the buttons. Some hex codes should appear on the Serial Monitor.
Note that you will receive FFFFFFFF code when you press a key continuously.

Package includes:
1x3-in-1 Remote Control
1xHX1838 Receiver

